AI Clothing Changer
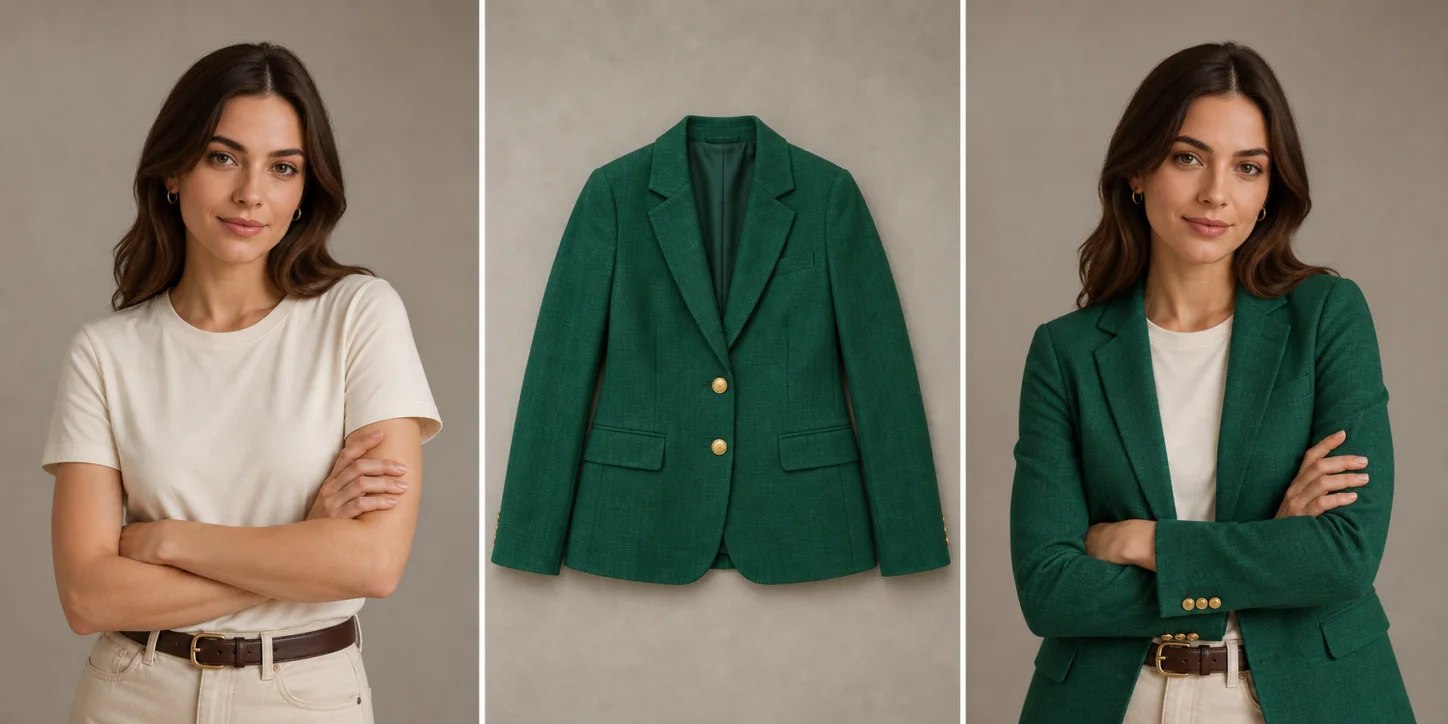
AI Clothing Changer: Guide the Outfit with a Real Reference
An AI clothing changer creates a new image in which the clothing is different while the person photo supplies the identity, pose, expression, proportions, lighting, camera angle, and surrounding scene. A separate garment reference gives the model visible information about the intended color, construction, pattern, closures, and silhouette instead of asking it to invent the entire outfit from a short style phrase.
The useful goal is controlled visual editing, not a promise that every pixel will remain fixed. Treat the output as a proposal: compare it with both inputs and check the face, hair, hands, body outline, garment edges, neckline, sleeves, buttons, pattern placement, background, and light before deciding whether it is suitable for your next step.
Build a More Controlled AI Clothing Change
Guide the Change with a Garment Reference
A vague prompt leaves the model to invent the garment's structure and styling. Add a separate flat-lay, mannequin, or on-model clothing image so the request includes visible color, collar, sleeves, closures, pockets, pattern, and overall silhouette. Use the result as a generated interpretation and check every detail that matters to the concept.
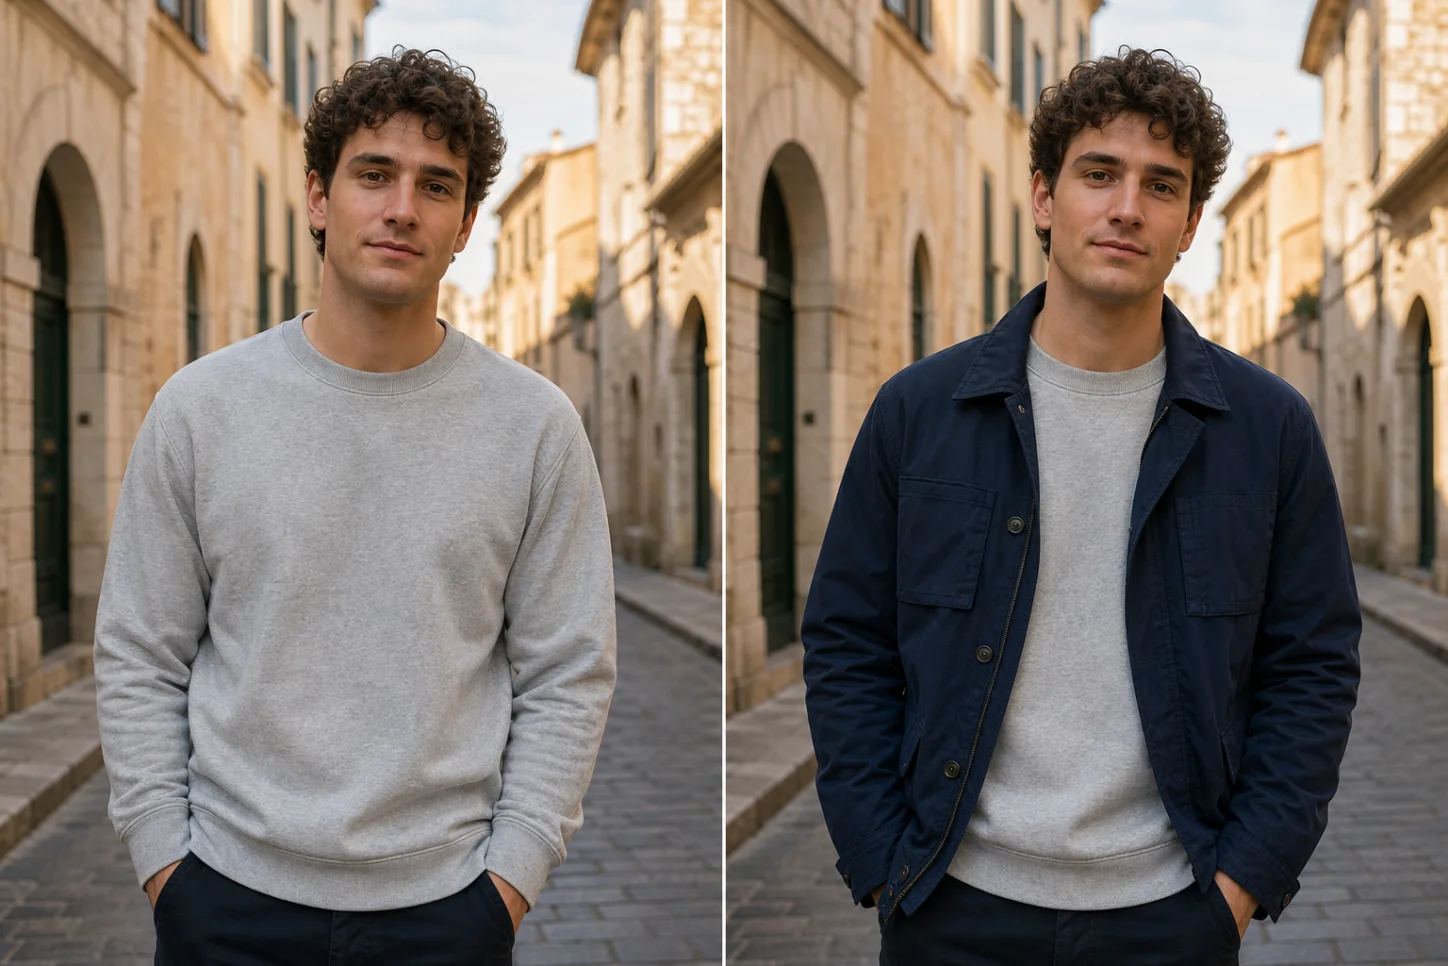
Keep the Person and Scene as the Anchor
A travel photo or portrait may already have the right face, expression, pose, framing, and background. Define the outer garment as the variable and name important elements that should remain, rather than combining the clothing change with a new location or identity. Compare the source and result closely because generated edits can still redraw details outside the requested area.
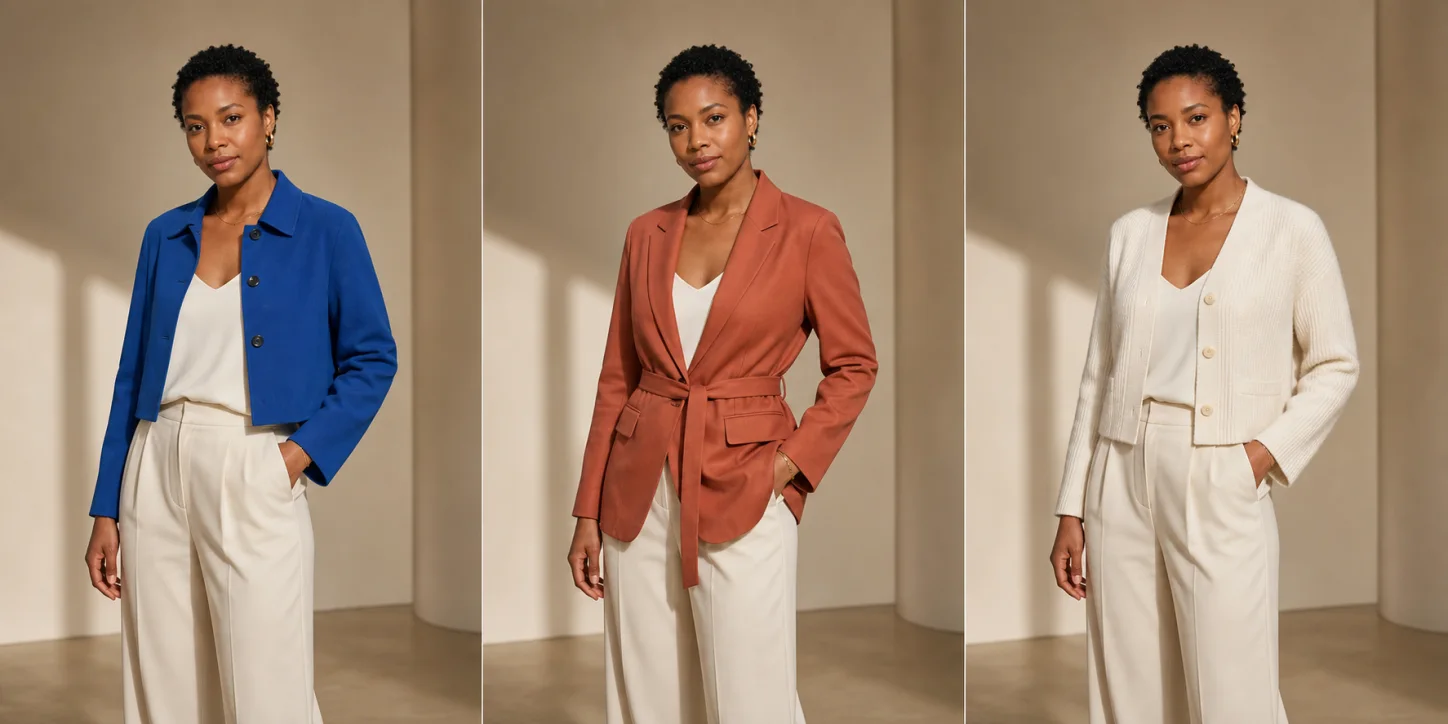
Compare One Wardrobe Direction at a Time
Creators often need several styling directions around one approved subject rather than unrelated new portraits. Keep the person, camera, pose, and studio constant while changing one outer outfit per request. This makes the concepts easier to compare and makes unintended changes to identity or composition easier to notice.
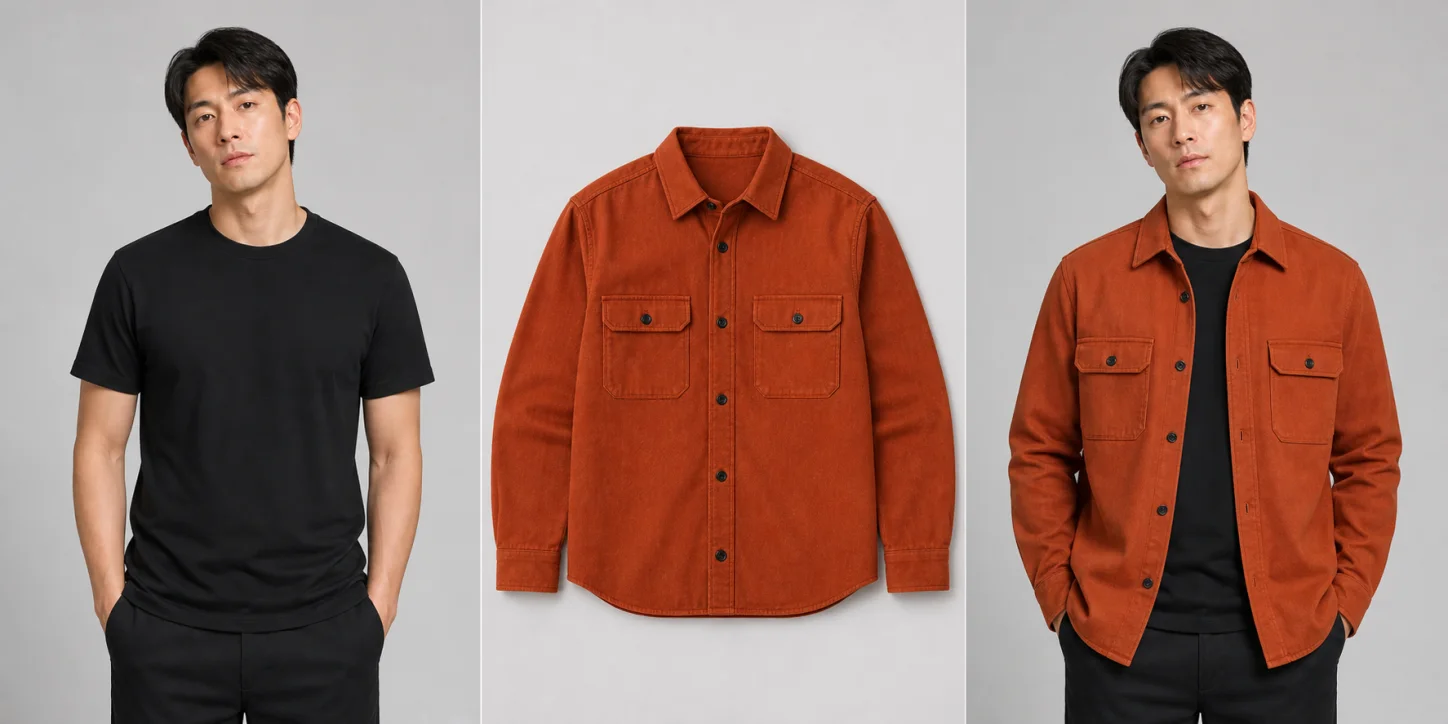
Inspect the Garment Before Publishing
A plausible outfit can still misplace a pocket, alter a button, shift a pattern, or change the intended color and silhouette. Put the reference next to the result and review construction details, fabric cues, edges, hands, and occlusion at full size. For product-facing work, treat the image as a draft until the real garment is represented accurately enough for the intended context.
How to Use the AI Clothing Changer
Choose a Clear Person Photo
Upload one JPG, PNG, or WebP image up to 10 MB. Keep the intended clothing area, body outline, pose, face, hair, hands, and background visible enough to compare with the result later.
Add a Detailed Garment Reference
Use a flat-lay, mannequin, or on-model image with the garment unobstructed. Make sure the color, collar, neckline, sleeves, pockets, buttons, hem, pattern, and silhouette you care about can be seen.
Describe What to Apply and Preserve
Write one focused instruction such as “use the green blazer, keep the cream shirt, face, pose, and background.” Avoid combining the outfit change with unrelated requests to redesign the person or scene.
Compare the Result with Both Inputs
Inspect identity, hands, body proportions, garment construction, edges, pattern placement, lighting, and background at full size. If one detail drifts, improve the reference or instruction and change one variable in the next attempt.
Use AI Clothing Changer for Real Visual Tasks
Restyle a Portrait or Travel Photo
Explore another outer layer for a fictional or authorized portrait without planning a second shoot. Keep the source nearby and check the face, hair, hands, pose, clothing overlap, body proportions, background geometry, and lighting before sharing the image. The result can communicate a styling idea, but it does not prove how the garment fits in person.
Plan Alternate Wardrobe Directions
Hold one subject and composition steady while exploring a small set of clothing concepts for a profile, campaign, editorial idea, or social post. Changing one wardrobe direction at a time helps collaborators compare the styling variable instead of reacting to a different face, pose, or environment. Use the concepts for direction-setting and verify any final production details separately.
Place a Garment into a Model Composition
Use a clear garment image and a suitable person photo to draft an on-model visual before committing to a complete production route. Review pocket placement, fasteners, collar, sleeve length, hem, pattern, color, material cues, shadows, and body interaction against the real garment. Publish only after the visual and usage rights meet the requirements of the store, ad, or marketplace.
Choose the Right Clothing-Change Workflow
| Feature / Model | Reference-led AI clothing change | Prompt-only outfit restyling | Manual mask and inpaint |
|---|---|---|---|
| Starting Input | Person photo and visible garment reference | Person photo and style words | Source image, mask, and editing knowledge |
| Control | Reference details plus a narrow preservation instruction | Model interprets garment structure from language | Direct region selection with more manual setup |
| Best For | Outfit concepts tied to a specific garment direction | Open-ended wardrobe exploration without an exact reference | Editors who need to define the replacement boundary themselves |
FAQs about AI Clothing Changer
What is an AI clothing changer?
An AI clothing changer uses a person photo and clothing direction to create a new image with a different outfit. A reference-led workflow adds a garment image so the model can see the color, structure, pattern, and other details you want it to interpret.
How do I change clothes in a photo with a garment reference?
Add the person photo as the source, then upload a separate image of the garment. Use the optional instruction to identify the item to apply and any visible element that should remain, then compare the output with both inputs before using it.
What person photo works best with an AI clothes changer?
Choose a well-focused photo where the person, pose, current clothing area, and body outline are easy to see. Heavy occlusion, crossed objects, extreme crops, or several overlapping people give the model less information about where the new garment belongs.
What garment image should I use with an AI outfit changer?
Use a clear flat-lay, mannequin, or on-model garment photo with the neckline, sleeves, hem, closures, pattern, and color visible. Avoid references where hands, bags, jackets, or other objects hide the parts you need the model to understand.
What should I check after changing clothes in a photo?
Compare the result with the person photo and garment reference at full size. Check the face, hair, hands, pose, body proportions, garment edges, neckline, cuffs, buttons, pattern placement, background, and lighting for unintended changes.
What can I do if the clothing change misses important details?
Use a clearer garment reference and narrow the instruction to one clothing task. Name the specific item and the detail that matters most, then review a new result rather than adding several conflicting style requests at once.
Does an AI clothing changer predict real-world size or fit?
No. The generated image is a visual clothing concept, not a measurement, tailoring, fabric-physics, size, or purchase-fit guarantee. Use actual garment measurements and retailer guidance when physical fit matters.
Does this AI clothing changer preview call a live provider?
Not yet. This route prepares the two-image workspace, SEO content, and result-review flow without claiming that a clothing-transfer provider result exists. A connected release still needs an exact operation, Credits, retry behavior, and approved output evidence.